+++ Save online price advantage now +++

How to Remove a Patio Door

In order to replace or renovate a patio door, it is necessary to remove the respective construction component first. But there is not always a need for professionals – this manual can help you to remove the component by yourself. As the process is the same with uPVC, aluminium and wooden patio doors, you will learn the basic steps and get an overview about all the important materials, as well as the appropriate tools in this instruction manual. The removal of a door is a job that can be performed by any do-it-yourself enthusiast without complications. Having the right materials ready and at hand is an absolutely necessary initial step to remove balcony or patio doors or windows. You should make sure to have the following materials and tools near the working area:

Materials

  • Foil for covering surfaces
  • New patio door

Tools

  • Hand-held milling machine (useful, but not strictly required)
  • Electrical rip saw or reciprocating saw
  • Crowbar, screwdriver, pincers and hammer
  • Ladder

1. Preparations

You should cover the working area with covering foil to avoid damage. When removing doors or windows, there is always a danger of soiling or damaging wooden floors, furniture or walls.

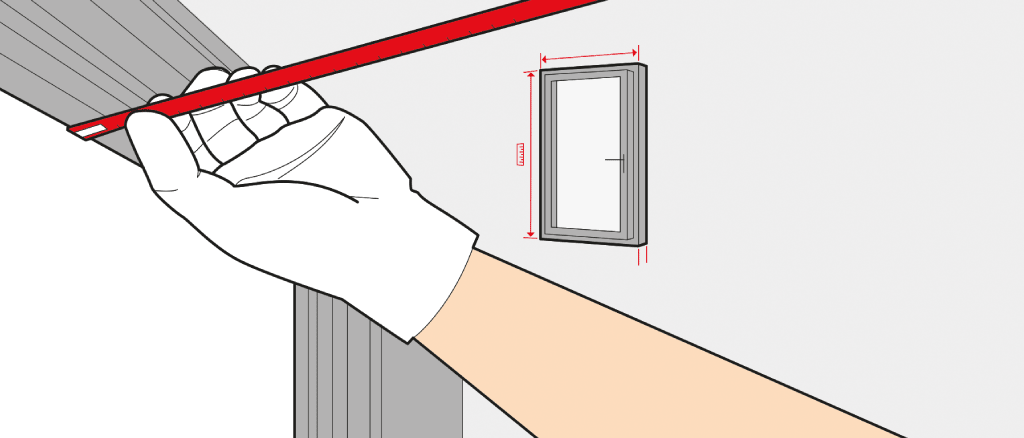
Whether you decided to install a uPVC, wooden or aluminium system: Never remove an old component before you have re-measured the dimensions. Re-measuring helps prevent complications with the fit-in procedure afterwards. A detailed manual on the correct measurement process can be found here (Fig. 1).
When removing a patio door, it can be very beneficial when someone helps. It is much easier and safer to lift-off the leaf together.

2. How to remove the Leaf of a Patio Door

Common doors consist of hinges, bearings, lock, leaf and doorframe. First you have to uncover the hinges to hang out the patio door. There are differences, depending on the respective age and opening mechanism of the door.

a) Removing the Leaf of an older Model

Follow the next steps, if your patio door has a tilt-mechanism.
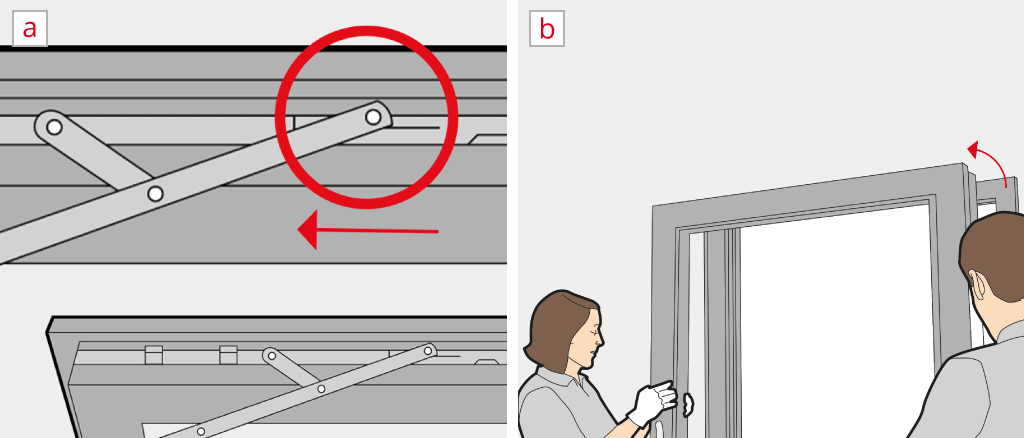
  • Unlock the patio door and open it. Turn the handle to the tilt position.
  • Lift the door, until the hinge leaves the corner bearings (Fig. 2a).
  • The door should now only be connected to the stay arm, a metal rod which ensures that the system can stay in tilt position. You can now remove the stay arm (Fig. 2b).

Some models do not have a tilt-mechanism. In this case, please continue to the next step.

  • Open the door and simply lift it off the hinges.

Hinges normally feature an oily layer to ensure their proper function. You should wear work gloves and work carefully to prevent furniture from soiling.

b) Removing the Leaf of an newer Model

It is significantly easier to remove modern doors – made of wood, uPVC or aluminium – here, pincers and a screwdriver will come in handy.
  • Unlock the patio door, if applicable, and open it.
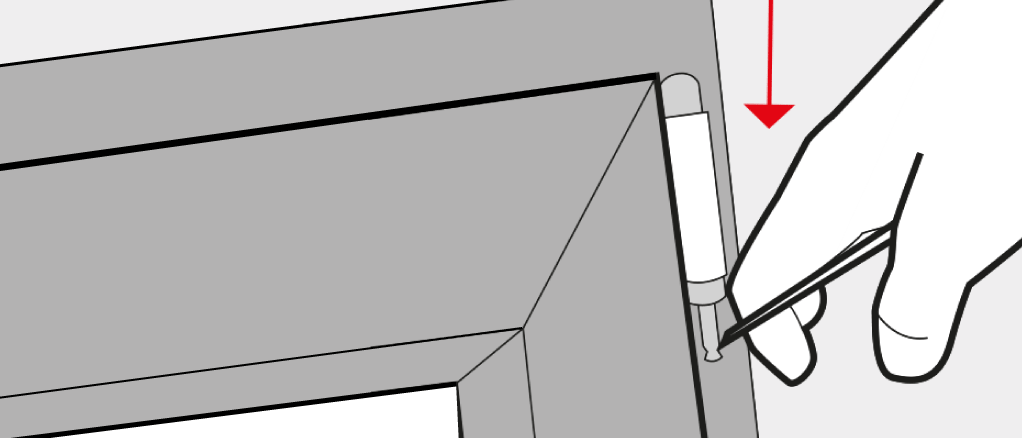
  • Stay bearings are normally protected by plastic covers. Remove these covers with pincers or a screwdriver.
  • Remove the metal rod from the stay bearing by pulling it in a downward direction (Fig. 3).
  • The patio door is now only mounted with the corner bearing and can be easily lifted out.

3. How to remove the Doorframe

Front and patio doors are embedded into the masonry to ensure excellent stability. You need a hand-held milling machine or rip saw and a crowbar to remove the frame from the masonry.
You should always protect your eyes from flying particles using safety glasses, work gloves and shoes.

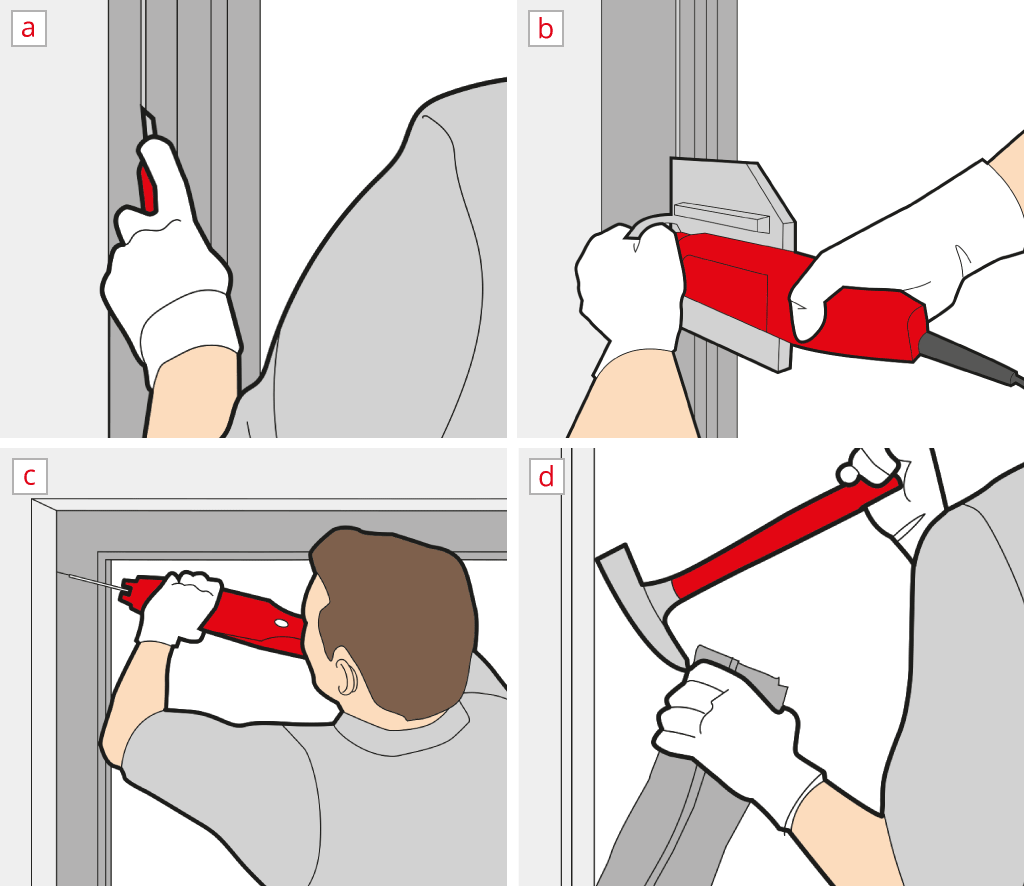
  • Before you start to remove the frame, you need to check existing roller shutters. Old built-on roller shutters need to be removed first, here it is sufficient to remove the guides from embedded roller shutters (Fig. 4a).
  • Make a cut on the left and right hand side with either a hand-held milling machine or a rip saw. Patio doors are usually only connected on the sides. It should therefore be enough to perform two cuts. If further connections are visible, you only need to cut the upper and lower section (Fig. 4b).
  • To simplify the removal procedure, it is recommendable to cut the frame into smaller pieces. Normally you will only need six cuts: 1 up, 1 down, 2 x left, 2 x right. Always cut in a V-shape. This prevents individual pieces jamming during their removal (Fig. 4c).
  • For the next step you will need the crowbar. Push it into the space between masonry and doorframe and lever the pieces out. Sometimes it is necessary to make a cut with the rip saw or the hand-held milling machine (Fig. 4d).

Especially when working with wooden or aluminium patio doors, you should make sure to wear solid shoes to protect yourself from falling parts.

This step-by-step manual guides you through the entire removal process. You will learn the basics that are also applicable for removal and replacement of windows. windows24.com additionally offers a detailed video manual on how to remove a patio door. This can help with further questions. 
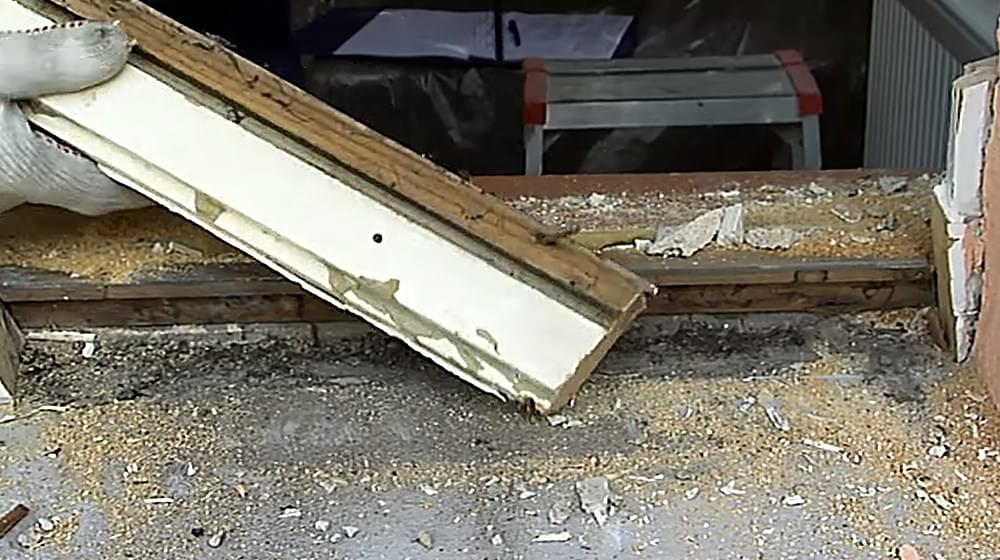
Removing windows, the right way! 00:53
Was this information useful?
1
2
3
4
5
(1 ratings , Ø 5)

to top